When you mount a new optic, the glass can look perfect and the dot can be bright, but if your hits don’t match where the dot sits, something is off. Until you understand how to zero a red dot sight, the optic can’t show its real value.
Retail buyers often worry about brightness or battery life, yet a stable, repeatable zero is what actually builds confidence. This guide is written for everyday shooters and retail customers, explaining how to zero a red dot sight in clear, simple steps without wasting time, ammo, or money.
We’ll cover what zero really means, how different zero distances change your holds, and how retailers can choose and sell optics that are easy for customers to sight in and keep dialed.
📈 Why learning how to zero a red dot sight matters
A proper zero means your point of aim and point of impact meet at a chosen distance. Once customers understand this, every shot makes more sense and every upgrade is easier to judge.
- ✅ Real confidence on the range – customers see the dot and know where their shots should land.
- ✅ Faster learning curve – new shooters can focus on stance and trigger instead of guessing why they missed.
- ✅ Better product trust – optics that hold zero well quickly become favorites and get recommended to friends.
- ✅ Cleaner feedback for retailers – fewer “this optic is bad” returns that are really just zero problems.
Retail insight 💡
When staff can clearly explain how to zero a red dot sight, customers are far more likely to buy an optic and keep coming back to the same shop for future upgrades.
🔍 Common mistakes when trying to zero a red dot sight
Most zero issues come from a few simple errors. Teaching customers to avoid these saves frustration and returns.
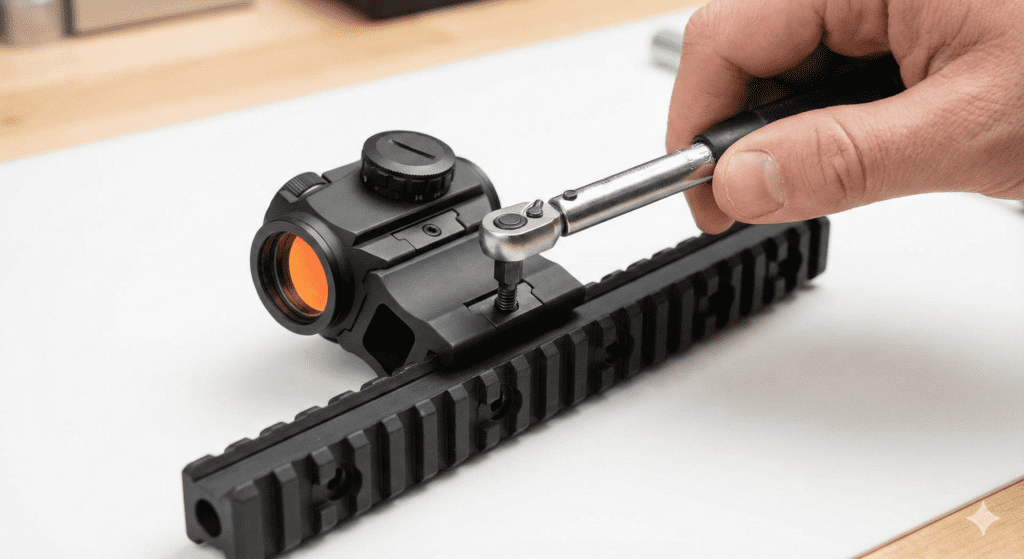
⚙ Problem 1: Weak or loose mounting
If the mount shifts, the zero shifts. Many “bad” optics are actually solid, but they were installed with soft screws, no torque guidance, or a low-quality mount that can’t handle repeated recoil and transport.
📏 Problem 2: Zero distance that doesn’t match real use
Choosing a random zero distance just because someone online recommended it can be confusing. A compact defensive setup zeroed very far away will feel strange at close indoor distances, and a short zero can feel limiting outdoors.
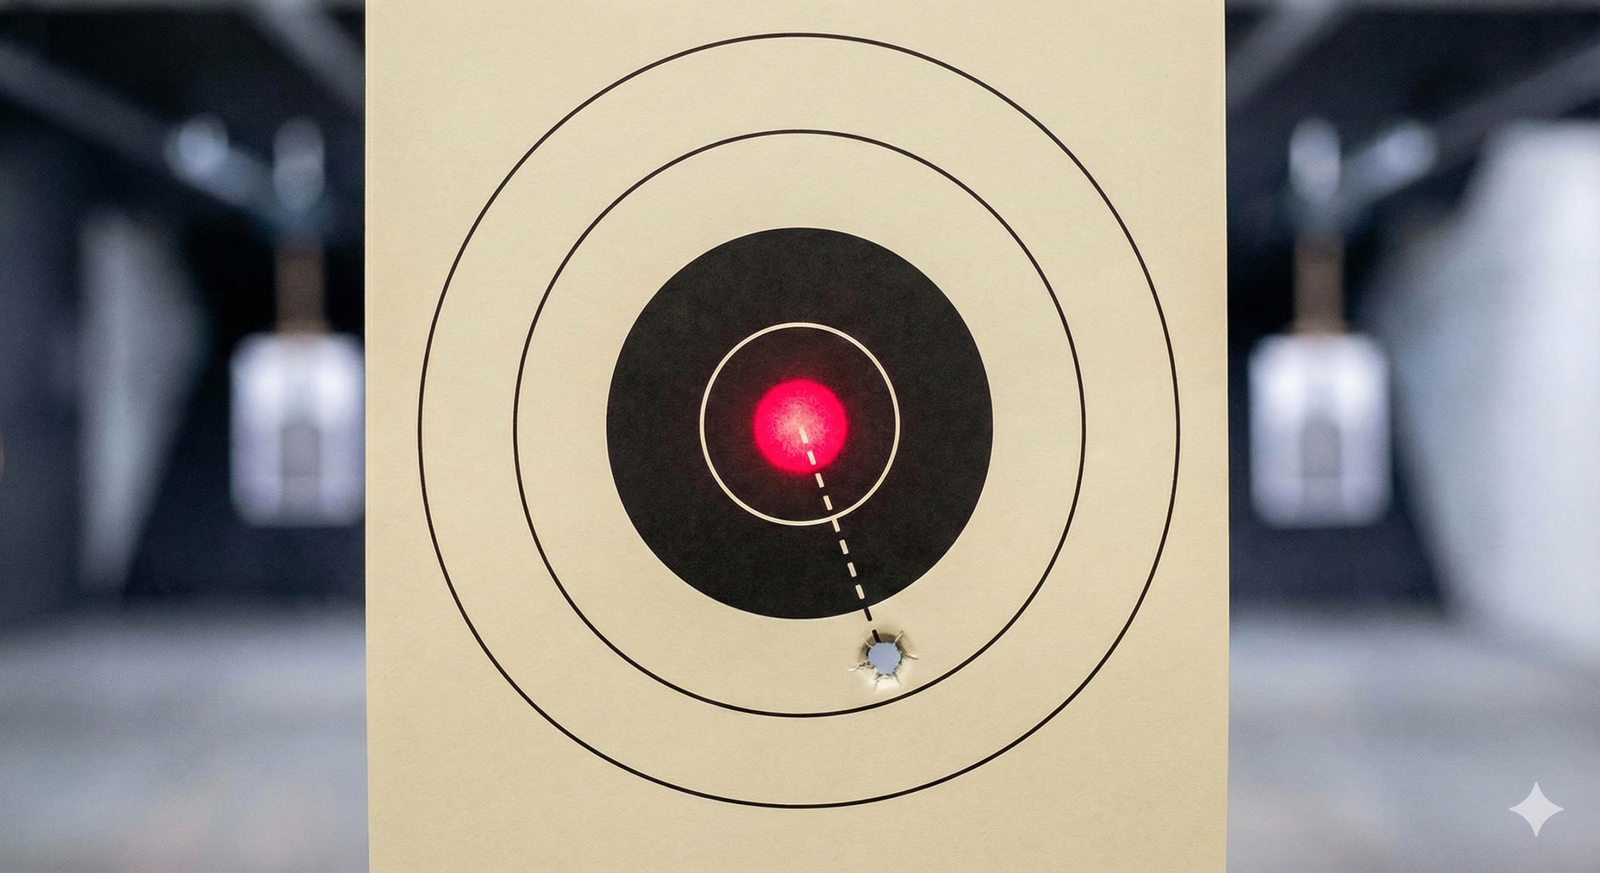
🎯 Problem 3: Chasing single shots instead of groups
New shooters often twist turrets after every impact. A smarter way to zero a red dot sight is to fire small groups from a stable position and adjust to the center of that group, not to the last bullet hole.
🌬 Problem 4: Ignoring shooter error and conditions
Inconsistent trigger press, body position, or environmental factors can spread shots. Customers may think the red dot won’t zero when they actually need basic coaching or a steadier rest.
📐 How to choose the right zero distance for your red dot sight
Picking a sensible distance is one of the most important parts of learning how to zero a red dot sight. It should match how the platform is really used, not just what sounds impressive.
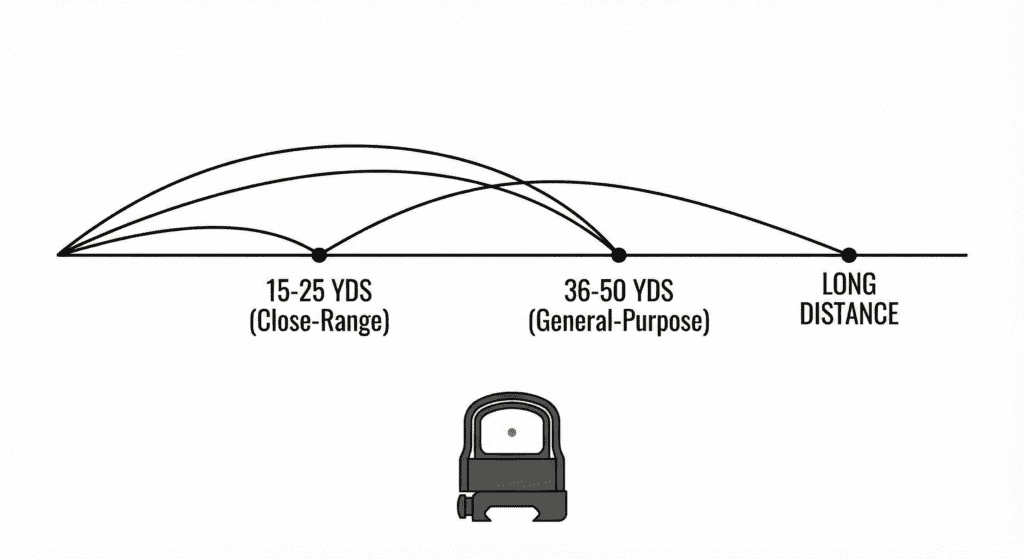
🏠 Close-range zero (about 15–25 yards)
Best for indoor ranges, compact setups, and users who rarely shoot far. It keeps the point of impact very close to the dot at typical room and short outdoor distances, making explanations simple for new shooters.
📎 General-purpose zero (about 36–50 yards)
Popular on versatile carbine-style platforms. This option keeps hits reasonably close to the dot over a wide distance band, so customers don’t have to memorize complicated holdovers.
🎯 Long-distance oriented zero
Some hunters or competitors zero at longer distances to match a specific role. This works, but it demands more understanding of bullet drop at close range and is usually better for experienced users than brand-new retail buyers.
Whatever distance a customer chooses, it should reflect how they actually train and practice most of the time, so their zero feels natural instead of confusing.
Edmund Optics Knowledge Center
🛠 Practical tips on how to zero a red dot sight
Exact steps depend on local rules and range procedures, but these principles make the process smoother for most users.
🔭 Tip 1: Use a stable rest and clear, high-contrast target
A stable rest reduces human error, letting the customer see what the optic is really doing. High-contrast shapes or grids make it easier to measure how far the group is from the aiming point.
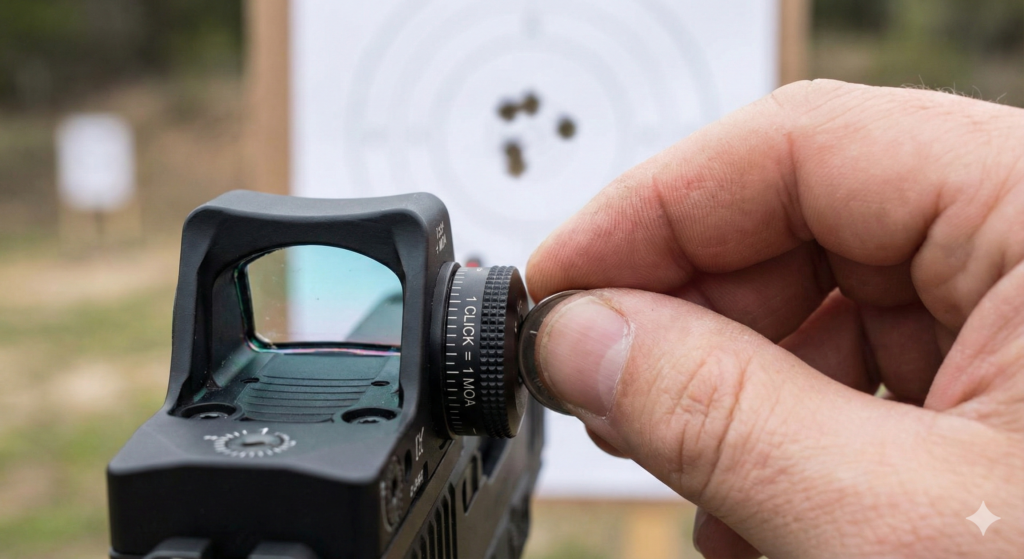
🔴 Tip 2: Understand turret values before dialing
Most quality optics use MOA adjustments. Clear marking such as “1 click = 1 MOA at 100 yards” helps customers plan corrections instead of guessing and over-adjusting.
🧪 Tip 3: Fire small groups and adjust to the center
A practical approach is to shoot a 3–5 shot group from a solid rest, mark the center of that group, and adjust the red dot toward that center. That’s the core of how to zero a red dot sight without chasing every individual shot.
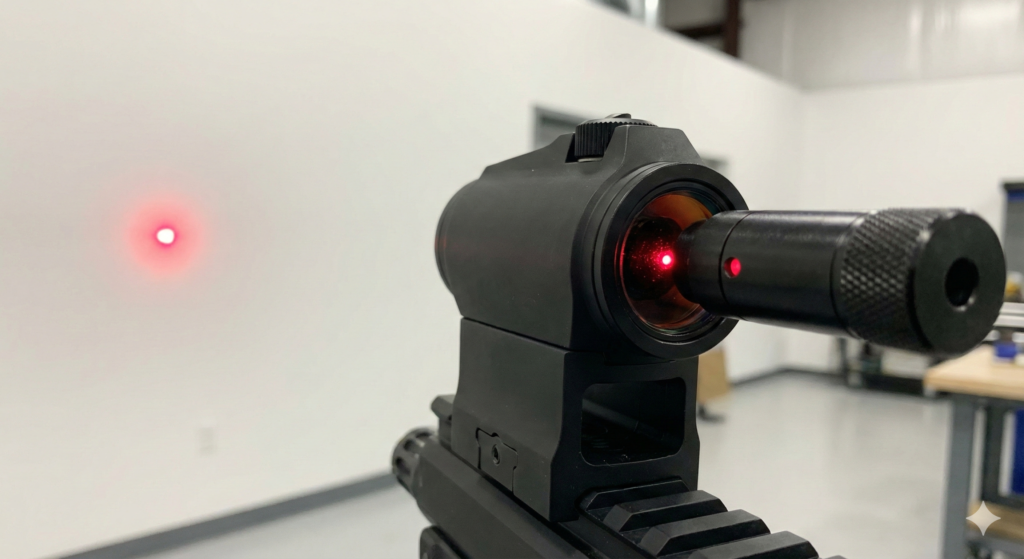
🔦 Tip 4: Use boresighting to get close faster
Laser or optical boresighting tools can put the dot roughly on target before live fire. This doesn’t replace range confirmation, but it saves time and ammunition, especially useful for retail buyers on a budget.
🧑🏫 Tip 5: Encourage customers to ask for help
Range staff, experienced friends, or shop personnel can assist with confirming zero, as long as all safety rules and local laws are followed. A few minutes of guidance can turn a frustrating day into a success story.
🧭 Matching zero strategies to different customers
For retailers, not every buyer needs the same setup. This quick map links user profiles to zero choices and talking points.
| User type | Suggested zero distance | Key priority | Sales tip |
|---|---|---|---|
| New shooter | 15–25 yards | Simple, close-range confidence | Offer basic mounting and initial zero support; keep explanations short and visual. |
| General-purpose user | 36–50 yards | Balanced performance at mixed distances | Explain how this makes a single zero work for most practice setups. |
| Competition-focused | Distance matched to typical stages | Exact holds at known ranges | Highlight repeatable clicks, rugged construction, and stable mounts. |
| Hunting-focused | Distance matched to typical shot | Reliable hits on small vital zones | Emphasize glass clarity, low-light performance, and long-term zero stability. |
| Home-defense oriented | Close or general-purpose zero | Predictable impact at short distance | Stress durability, simple controls, and routine zero checks during practice. |
📊 Comparison of zero distances when you zero a red dot sight
This table gives retail customers a fast overview of how different zero choices affect their experience with a red dot.
| Zero distance | Best for | Advantages | Trade-offs |
|---|---|---|---|
| 15–25 yards | Indoor ranges, short-range practice | Very intuitive at close distance; easy to explain to beginners. | Requires more holdover understanding at longer distances. |
| 36 yards (approx.) | Carbine-style platforms with mixed use | Good balance for close to mid-range training. | Trajectory can be less obvious for brand-new shooters. |
| 50 yards | Outdoor practice with general-purpose setups | Simple holds across many real-world distances. | May feel “far” for customers who only shoot on short indoor lanes. |
| Longer distances | Specialized hunting or competition roles | Precise alignment at a specific, known range. | Close-range point of impact may sit noticeably away from the dot; better for experienced users. |
🤝 How retailers can support customers learning how to zero a red dot sight
For retail businesses, teaching customers how to zero a red dot sight turns a one-time sale into a long-term relationship.
- 📦 Offer mounting and basic boresighting packages with each optic.
- 📄 Include simple zero-distance charts in the box, branded with your shop name.
- 🧪 Keep demo units on the counter so staff can show how adjustments move the dot.
- 🎨 Work with OEM/ODM partners to print clear MOA and zero information on the product and packaging.
- 📞 Promote after-sales support so customers know they can ask for help if their zero drifts over time.
AKSIGHT focuses on optical sights only, making it easier for retailers to stock mission-ready red dots that are intuitive to zero, with clear MOA markings, shock-tested housings, and IP-rated sealing. Low MOQs, OEM/ODM options, fast lead times, and responsive support help you create store-branded optics that your customers can zero quickly and trust for the long run.
❓ FAQ – questions customers ask about how to zero a red dot sight
Q1: What is the simplest distance when I first learn how to zero a red dot sight?
Many beginners find 15–25 yards easiest. It matches typical indoor ranges and keeps the point of impact close to the dot at the distances they actually use.
Q2: How often should I check my red dot sight zero?
It’s wise to confirm zero after any hard impact, after removing and reinstalling the optic, or after long gaps between practice sessions. Regular checks keep surprises to a minimum.
Q3: Do I need a bore sighter to zero a red dot sight?
No, but a bore sighter can help you start closer to the final zero and save time. Live-fire confirmation under safe, supervised conditions is still necessary for best results.
Q4: Why does my zero move when I change ammunition or conditions?
Different loads and environmental conditions can slightly change point of impact. For critical use, confirm your zero with the same type of ammunition and in similar conditions whenever possible.
Q5: Is there one “best” way to zero a red dot sight for everyone?
No single method fits all shooters. The best way to zero a red dot sight depends on distance, platform, and typical use. The key is choosing a clear zero distance and understanding how trajectory behaves around it.
Q6: Can a new shooter learn how to zero a red dot sight alone?
Many new shooters learn successfully with written guidance and patient practice, but working with qualified range staff or experienced friends can speed things up. Always follow local laws and all posted safety rules at any training facility.
⭐ Final thoughts – helping customers master how to zero a red dot sight
Once a shooter understands how to zero a red dot sight, every trigger press delivers clearer feedback. A solid mount, a sensible zero distance, and patient group-based adjustments turn frustration into confidence and make your optics recommendations truly shine.
For retailers and brand owners, partnering with a specialist like AKSIGHT means your customers get red dot sights that are easy to mount, easy to zero, and built to keep that zero under real-world use. With OEM/ODM customization, low MOQs, strong shock resistance, IP ratings, and fast lead times, you can deliver optics that perform like pros and keep buyers coming back for their next mission-ready sight.
Related reading: